Tuesday, July 19, 2016

I’ve been absent for a while, but for a good reason....

Life is full of surprises..... our family was so happy in Indiana, lots of friends, my work was growing, more students were join Cartonnage with me….. and then….. suddenly we got to start everything over again! Due to my husband’s new job we have to move… look for a house in a new city, new state…. and we have been in this process for almost 6 months…. 
If you have passed for a situation like that, you probably know how exciting and frustrating that can be at the same time…. but now, that everything is getting solved,  we found our place and as we have been enjoying a great summertime in our new city near the Lake Michigan (even in a small temporary living), we can say that we will be very happy in Michigan as well! I know winter time will come with lots of cold weather and snow, but we will enjoy it for sure. Grand Haven, Michigan, will be our new address (our definitive moving will be by the end of August)! God knows our path better than us, so, even when we don’t understand the things in the moment, latter we will find the purpose!!  


(My family at Muskegon State Park, MI, June, 2016)

During these six months, I have been planning the future, learning new fiber arts techniques with an amazing new friend (thanks Lynn!!), listening to my heart and deciding how to continue my work from now! I know some of my students were expecting more classes, but trust me, I needed that time to think and to start over now with much more confidence!

I also have been working in the new plans I have for the future! I can’t tell so much now, but I think you will love, I am preparing everything with so much care!  The DIY kits will have a new look and will be available in selected stores….. A great online Free workshop will happen in September…. New online classes are coming! I am enjoying the time and making all of them the best I can! Wait for more news as I go ahead and finish them…..

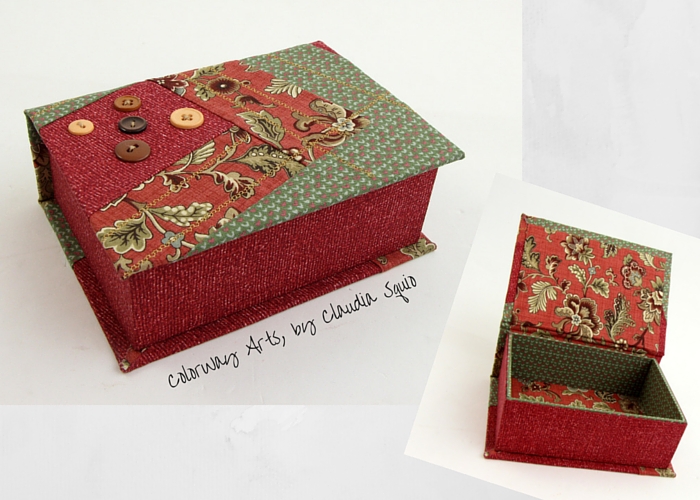
Another thing I have been working and enjoying so much is looking to my projects in a different way…. instead of designing more advanced pieces at this time, I decided to turn my hinged lid boxes and journal covers into something really unique, something that I am so proud and happy making …even with my lack of skills for that!!... but that doesn’t matter for me now, the important thing here is that I had so much fun making and I know everyone that join me in this new journey for Cartonnage will be so happy with the results as well! At the end, I don’t know if will be easy  to give away the pieces…. Because they are made with the soul... they are not just crafts….they are arts!!…… but for sure those would be amazing gifts!

What you will see below is what I am talking about! Inspired in the nature that I am surrounded now (tulips, flowers, lake, boats…..) and mixing other arts with cartonnage, those are what I got till this moment! Please don’t take a closer look to my sewing’s…. I am not good at all in this….I have so much to learn from all of you, my students and friends that are great quilters…. And I will learn soon…. But I had to make those even with this lack of skill to sew, because I loved the overall results, and I am imagining how beautiful pieces my students will make from here…..

The first ones I made right after visiting Holland for a Tulip Festival in May….. For these pieces I used a fabric that I had hand painted some time ago and I coordinate it with denim (I love using denim!)

                              (Tulip Festival, Holland, MI, May, 2016)


(Boxes and journal cover made with hand painted fabric and flower applique)

Then, I was wondering if I could make some projects out of quilts…..I have made some in the past, but just applied miniature quilts to the cover, now my goal was to make a quilt at the size of the piece and then, make the boxes and covers….. and I just LOVED the result…..and  I can’t wait to see my student’s beautiful quilts turned into boxes!!!


(Quilted boxes.... Is this an appropriate name?)

I spent some great time at the beach in our new city with my family…. And looking to that amazing nature I was so THANKFUL, and got inspired to make more…..
For these next pieces, I started hand painting the fabric, then I applied the boat and then, I sewed over to create the scene! (please don’t judge my terrible stitches….I said I will be better in that!). Then, I made the journal cover and the box! How amazing is that?!!! How many different boxes and cases we can make mixing techniques?? Endless…………


(My cartonnage art at North Shore Beach, Spring Lake, MI)


Last, but not least.....in my free time I also love cross stitch. And I was far away from my fabric and glue sometimes during these months, and then, I made some stitches and applied to my box!


Well, that’s part of what I have been doing recently.  I hope you liked… I can tell you that I had so much fun in every part of the process. For sure I will continue making pieces just covered with fabric, but with this option of mixing arts we can add even more value, personal value to Cartonnage pieces, do you agree? Do you want to try it? I will love hearing from you! Comment! 

Monday, February 8, 2016

Lots of colors for your week!

Hello!

Just finished the most colorful pieces I have made!! And....love them all!


I am always using more neutral colors and this time following an indication I decided to try some more colors..... just saying.... we have to try new things, new colors, new designs.... we can be surprised with the results! 


Soon I will be posting about Cartonnage classes coming up in Indiana! 
If you live far away from here, you can learn Cartonnage in my Online school!

I wish you all a wonderful week! 

See you!

Wednesday, December 2, 2015

More about fabric Christmas ornaments! Because I love them, I made a video now!

Hey everyone!

I loved so much my fabric Christmas ornaments that I decided to make a video to show you how easy it is to make them! The tutorial to make the ornaments reusing cereal boxes are available here. I also have complete instructions with lots of pictures showing how to make them in my FREE online course Joy of Cartonnage! Check it out!

Take a look at the video and have fun making the ornaments! Kids are totally welcome to help, they will love to make them! My daughter made some already!

If you have any question, comments or suggestions, I will love to hear from you!

Have fun with paper, fabric and glue!

Claudia


Friday, November 20, 2015

Making fabric Christmas ornaments reusing cereal boxes


Christmas is coming soon! It is time to decorate our homes for this important Holiday! How about making some unique fabric Christmas ornaments reusing cereal boxes this year? 

I have decided to make some for my home and enjoyed so much that I want to share with you how to make them! It is easy, simple materials, we can reuse cereal boxes, use some fabric scraps and with our creativity we can make beautiful ornaments! Let’s see how to make them?


You can get the basic here in this tutorial. Complete instructions with much more detailed information and a lot of pictures you can get in my FREE online course Joy of Cartonnage! Click here, sign up for Free and get this instruction and much more! 

MATERIALS:
Very simple materials. To make the ornaments you will need:
-  Empty cereal boxes (or other thin chipboard same  thickness  as cereal box)
- Scraps of fabric
- Ribbons / Embellishments  (optional)
- PVA glue (like Glue All from Elmer’s), cutting board, craft knife, rotary cutter, paint roller, paint brush, plastic spatula and/or bone folder, corner miter tool (optional), masking tape,  scissor, paper to cover the table.


MAKING THE SHAPES OUT OF CEREAL BOXES:

You will need two pieces of paper with the same shape for each ornament. To reuse cereal box, cut the front and back of the empty box and draw the shapes you want on it (picture 1). 

I made the circles with 2.5 in (6,5 cm)  diameter, but you can make it with the dimension you want. You can use a base of a circle mug, for example, to draw the shapes.

The diamond ones I made with 3 x 3 in (8 x 8 cm)  and  the frontal detail with 1.5 x 1.5 in (4 x 4 cm), or 2 x 2 in (5 x 5 cm). 

After drawing the shapes, use scissor or craft knife with metal ruler and cut the shapes (pictures 2 and 3). Attention: to have great finishing for your ornaments take your time and cut the shapes as perfect as you can. 


MAKING CIRCLE ORNAMENTS:


Cut the fabric about 1/2 in bigger than each shape. 
Apply glue over the unprinted side of the cereal box circle. Spread the glue very well, you have to have a thin layer covering all paper. Do not put too much glue. Then, glue this paper over the center of the back side of the fabric. Flip over and press over the fabric with your hands, making sure the fabric is well glued, without bubbles.  (pictures 4 and 5) 

Then, cut all around the circle with scissor, following the shape and leaving a border of fabric about ½ in (1 cm) (picture 6). After that, make small cuttings all around the fabric (picture 7). 

Now  apply glue on the border of the circle and fold the fabric pressing with your fingers to have all fabric glued all around the paper. Repeat for the other circle. (pictures 8, 9 and 10).

APPLYING EMBELLISHMENTS

Cut a piece of the embellishment you want to apply, 1.5 in (4 cm) bigger than the diameter of the circle. Put it over the front of your circle,  in the position you want (picture 11). Turn over carefully to avoid moving it. Then, apply glue over the back of the circle where you will glue the embellishment. Glue it and apply a piece of masking tape over to better fix it. Repeat to the other edge of the embellishment. (pictures 12 and 13)

Now  apply glue on the center of the circle where you will glue the ribbon to hang the ornament. Put a piece of ribbon with the size you want  and apply a piece of masking tape over it, as shown below. (pictures 14 and 15)


GETTING READY!
Apply glue all over the back of the covered circle that will be the back of your ornament (picture 16). Pay attention to not mark the front of this piece with glue. Then, put it over the back of the other circle with the embellishments. Press firmly with your hands to make sure it is in the right position (picture 17). Put some pieces of masking tape all around the ornament. Press again all over the masking tape (picture 18). This masking tape will be removed after 7 hours.  Let the ornament dry under something heavy, like a heavy book, for about 7 hours (picture 19). 

After 7 h take off the masking tape and your ornament is ready to go!   

MAKING DIAMOND ORNAMENTS


Cut the fabric about 1/2 in bigger than each shape.  
Apply glue over the unprinted side of the cereal box diamonds. Spread the glue very well, you have to have a thin layer covering all paper. Do not put too much glue. Then, glue this paper over the center of the back side of the fabric. Flip over and press over the fabric with your hands, making sure the fabric is well glued, without bubbles.  (pictures 4, 5 and 6) 

Before folding and gluing the fabric over the paper, we need to cut the fabric at all corners, to have a good finishing. To do that, you can use a corner miter tool that it is a very functional tool for that, OR, if you don’t have it, you can cut with scissor (pictures 7), but you have to have some fabric at the corner, do not cut straight with the paper. You can find the corner miter tool here. If you want to see better how to do this step, take a look at this video. 

Cut the fabric at the corners for the three pieces of paper (picture 8).


Apply glue to one of the edges of the paper (picture 9) and also apply glue on the fabric at both corners of this edge (picture 10).  Using a plastic spatula, fold the fabric over the paper and press down until be well glued (picture 11). Also press down on the fabric at both corners (picture 12).   Repeat this to the opposite edge, and then apply glue and fold the fabric over the other edges (picture 13). Make sure your corners are neat. If you need, make adjustments with your fingers (picture 14). Cover like that the three paper diamonds (picture 15).


APPLYING EMBELLISHMENTS

In this case, the embellishment will be another piece of covered paper, but you can use your creativity and add another thing, like we did for the circle.

Now,  apply glue all over the back of the small diamond (picture 16), taking care to not move this piece and mark the front of it with glue. Then, put it on the right position, press firmly with your hands (picture 17) and apply masking tape all over it. Press again after applying the masking tape (picture 18).  

If you want to apply a tassel,  apply glue on the center of the diamond where you will glue the tassel (picture 19).  Put the tassel there and apply a piece of masking tape over it (picture 20).
Now  apply glue on the center of the diamond where you will glue the ribbon to hang the ornament (picture 21). Put a piece of ribbon with the size you want  and apply a piece of masking tape over it (picture 22).


GETTING READY!

Apply glue all over the back of the covered diamond that will be the back of your ornament (picture 23). Pay attention to not mark the front of this piece with glue.  Then, put it over the back of the other diamond with the embellishments. Press firmly with your hands to make sure it is in the right position (picture 24). Put some pieces of masking tape all around the ornament. Press again all over the masking tape (picture 25). This masking tape will be removed after 7 hours.  Let the ornament dry under something heavy, like a heavy book (picture 27).    


After  7  h take off the masking tape and your ornament is ready to go! Enjoy!

That's it! I hope you can understand the process and enjoy making your ornaments! 

The complete instructions with more pictures, including instruction and template to make a star ornament you can get in my FREE online course Joy of Cartonnage! I hope to see you there!

If you have any question, you can comment below or contact me anytime! I will be very glad to answer you! If you want to share the pictures of your ornaments with me, I will love to see them!

If you like it, please share with your friends!

Have a great preparation for Christmas! 

Claudia

Wednesday, November 11, 2015

Have great finishing for your Cartonnage and bookbinding projects everytime!

Hello,

As a cartonnage teacher, I know how important is to have great finishing on our Cartonnage projects. If you have had a chance to take classes with me, you know how to have great corners, but, you may have forgot some details..... 

If you didn't take a class with me, then, it is kind of difficult for me to add all the tips on a written instruction. So, I decided to make a video showing in detail how to apply glue and have great and neat corners for all cartonnage projects! The tips are also great for bookbinding!

Watch the video now!


Any question, comments or suggestions? I will be very glad to hear from you! Feel free to contact me anytime: squio.claudia@gmail.com

I hope you enjoy this video! If you like it, please comment, share with your friends!

Thank you so much, enjoy the video!

Claudia

Sunday, November 8, 2015

How about making a reusable fabric journal cover?


The first Cartonnage piece I have made using paper, fabric and glue was one reusable journal cover! At that time I fell in love for this amazing technique and couldn't stop anymore...... I love the way we can coordinate fabric, cut different sizes of paper and always have a new and unique piece!

My students love the journal cover, they are so proud of using them and also they have made some of them for gifts. 

That's why I decided to offer an ONLINE class for making a reusable journal cover. In this class you will learn everything to make your own fabric journal cover, using the dimensions I give and cutting your paper, or, buying a DIY kit with all paper needed to make the project. Also, I teach how to make a cover for any size of journal. More than this, you will learn:
- Materials and dimensions
- How to cut paper
- Important tips
- Making the outside of the cover
- Covering the outside with one fabric
- Making the inside of the cover
- Variation 1 - applying elastic to the cover
- Finishing the journal cover
- Final step: taking off the masking tape and other important tips to solve some problems
- Variation 2: covering the outside of the cover with two fabrics
- Variaton 3 - applying button to close the journal
- Variation 4 - reusing cereal boxes to make small journal covers

All these topics are videos (almost 2 h of videos!!) that you will be able to stop, return, pause, and make the project on your own pace! And plus, you will also have  instructions with pictures step by step that you can print it out, make notes and follow when making the project.

And I'm excited to share with you the journal covers an online student made recently, aren't they beautiful?

Take a look what she is talking about this online class:
Claudia does an excellent job of describing the process of Cartonnage. The videos are easy to follow and Claudia explains each step in great detail. You can rewind and fast forward to do the work at your own pace. Claudia will answer any of your questions that come up. Cartonnage does not require any specialized tools  but the toolkit makes things easier. The kits will save you time because all the paper is already cut out. But you can cut the paper out yourself too. Cartonnage is fun and not difficult to learn! I would recommend these videos for anyone interested in learning about Cartonnage. Betsy


You may be are thinking what is the difference between having a local class with me or taking an online class?
I would say, if you live near Indianapolis, then you can take my local classes (one or more), and start making some cartonnage classes there. But if you live far from here, then, the online class it is easier for you. Plus, even if you take local classes, or live nearby, when you are taking online classes you have a chance to start the project and make it at your own pace, you can stop, return, make it in parts..... and you will see all the details as you were right in front of me! And you will have the content available forever.... yes, once you buy a class, you will have unlimited access to it!

You may be are thinking that the online classes are expensive!
I would say that I am working hard to offer the best classes I can. I am asking for feedbacks of the students, and I am including any extra information I think is necessary to the complete understanding of the technique, my goal is to see beautiful covers made by all the students! 
If you have any question, anytime, you can always contact me and I will be very glad to help you finish your project!
I am working alone, so, I am a small business, and don't have a support of the big craft websites to do that, so, when you buy class for me, you are supporting a small business, a teacher, a family!
Plus, you will not see so much other Cartonnage online classes around.

You may be are thinking and what if I don't like the classes?
Don't worry, I dont' want you to be unhappy. If you are unsatisfied with your class, you have 30 days to have a full refund of your money!

If you have any question, please let me know! 
If you want to learn online how to make a reusable journal cover, I am offering a 10% discount OFF for you to start now. Go to:


I hope to see you there! Any question, I will be very glad to answer you, please contact me!

Claudia


Friday, October 2, 2015

Have you tried Cartonnage?

Do you know what Cartonnage is about? Have you tried this craft?

I have been making Cartonnage for a while and I fell in love for this technique when I made my first project! Since there I am always excited to make a new piece, change fabric, design and get a unique handmade box or case!

As I am also a Cartonnage teacher, I made this video thinking about who wants to know what is cartonnage and also, thinking of my students, that can always take a look on how I cover a piece of paper with fabric.... the base for any Cartonnage project! 

So, take 4 minutes to look at this short video! 

I will be happy to hear from you!

Thanks, 

Claudia